5.6 KiB
Administration Console
The administration console is divided into 3 main components
- Web Interface
- API for communication with the other components
- Database
Web Interface (ogGui)
ogGui
ogGui is a frontend project developed in Angular to provide a user interface for the OpenGnsys tool.
Development Environment
This project has been developed and tested in the following development environment:
- Operating System: Ubuntu 22.04.3 LTS (Release: 22.04, Codename: jammy)
- Code editor: Visual Studio Code 1.87.2
- Node.js: v22.1.0
- npm: 10.7.0
- Angular CLI: 12.0.3
- Angular Core: 12.0.1
- Angular Material: 12.0.2
Installation
- Install the most recent version of Node.js (v22.1.0)
https://nodejs.org - If you don't have npm installed
sudo apt install npm - Install Angular CLI >= 12
npm install -g @angular/cli - Clone this repository to your local machine using Git.
- Navigate into the /ogWebconsole directory.
- Install the project dependencies
npm install. - To run the application in development mode, use the
ng servecommand. The application will be available athttp://localhost:4200/.
API (ogCore)
Description
ogCore is the central service of OpenGnsys, designed to provide functionalities through a RESTful API. This tool uses PHP technology, leveraging the Symfony framework and the Doctrine ORM to manage the database.
Below are the steps required to deploy the project in a development environment.
Versions and Technologies Used
- PHP 8.3
- Symfony 6.4
- Doctrine 2.19
- API Platform 3.2
- MariaDB 10.11
Requirements
Before starting, make sure you have the following requirements:
- Docker
- Docker compose
Installation
Deploy Containers
To avoid port conflicts, ensure that no services are running on ports 8080 and 3306.
docker compose up --build -d
Check that the 3 application containers have started correctly:
docker ps
And you should see something like:
- ogcore-nginx
- ogcore-php
- ogcore-database
Install Dependencies
docker exec ogcore-php composer install
docker exec ogcore-php php bin/console lexik:jwt:generate-keypair --overwrite
Check that the Nginx container has port 8080 up correctly, so all we need to do is access the following URL:
http://127.0.0.1:8080/docs
If all went well, we should see the ogCore API documentation.
To update the database:
To initialize the database:
docker exec ogcore-php php bin/console doctrine:migrations:migrate --no-interaction
docker exec ogcore-php php bin/console doctrine:fixtures:load --no-interaction
docker exec ogcore-php php bin/console app:load-default-user-groups #cargamos los grupos por defecto
docker exec ogcore-php php bin/console app:load-default-commands #cargamos los commands por defecto
API Platform UX
API Platform provides a user interface to interact with the ogCore API. To access the user interface, go to the following URL:
http://127.0.0.1:8080/docs
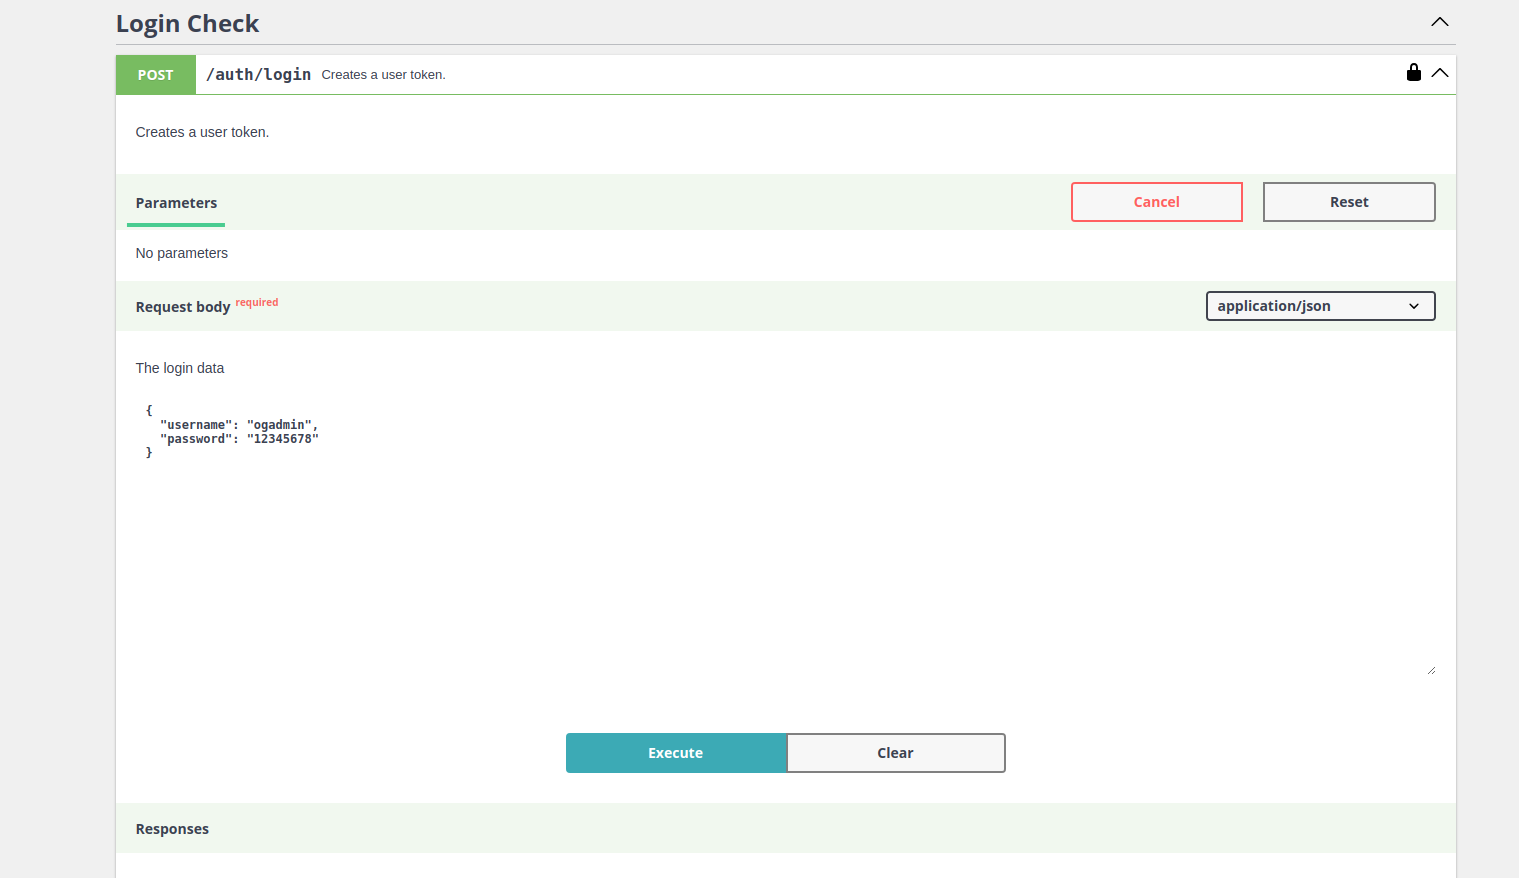
To authenticate, you need a JWT token. To obtain it, access the "auth/login" authentication endpoint:
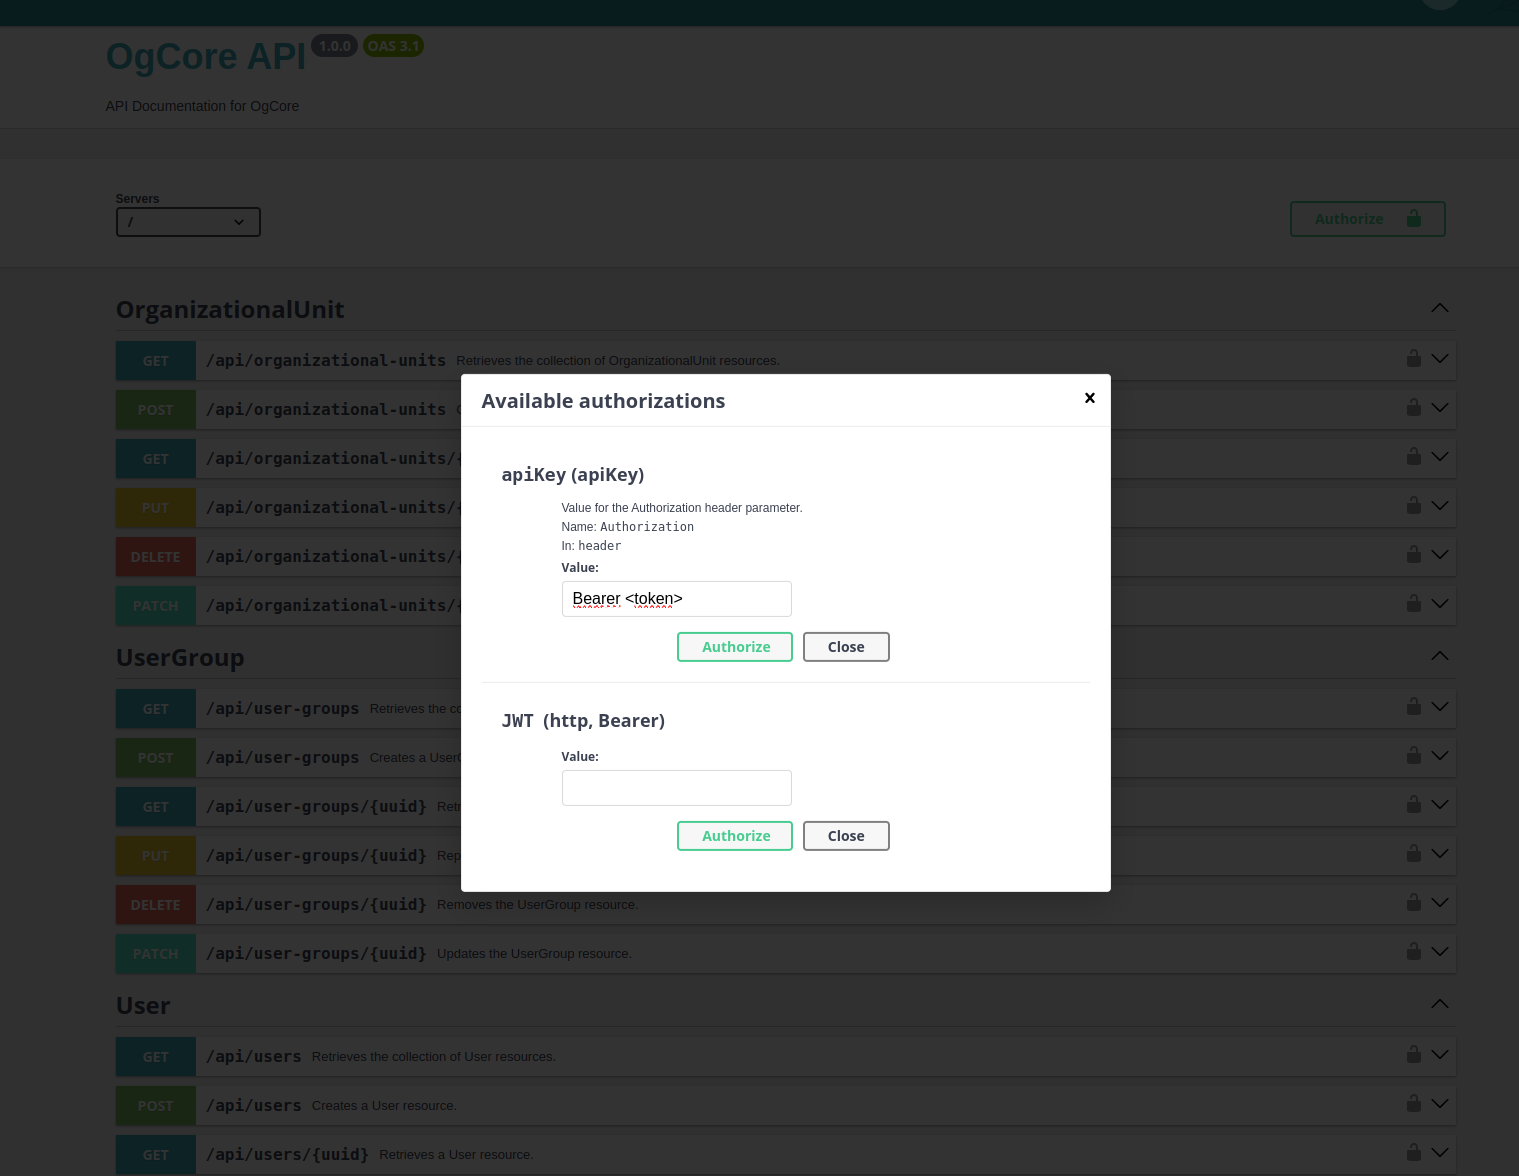
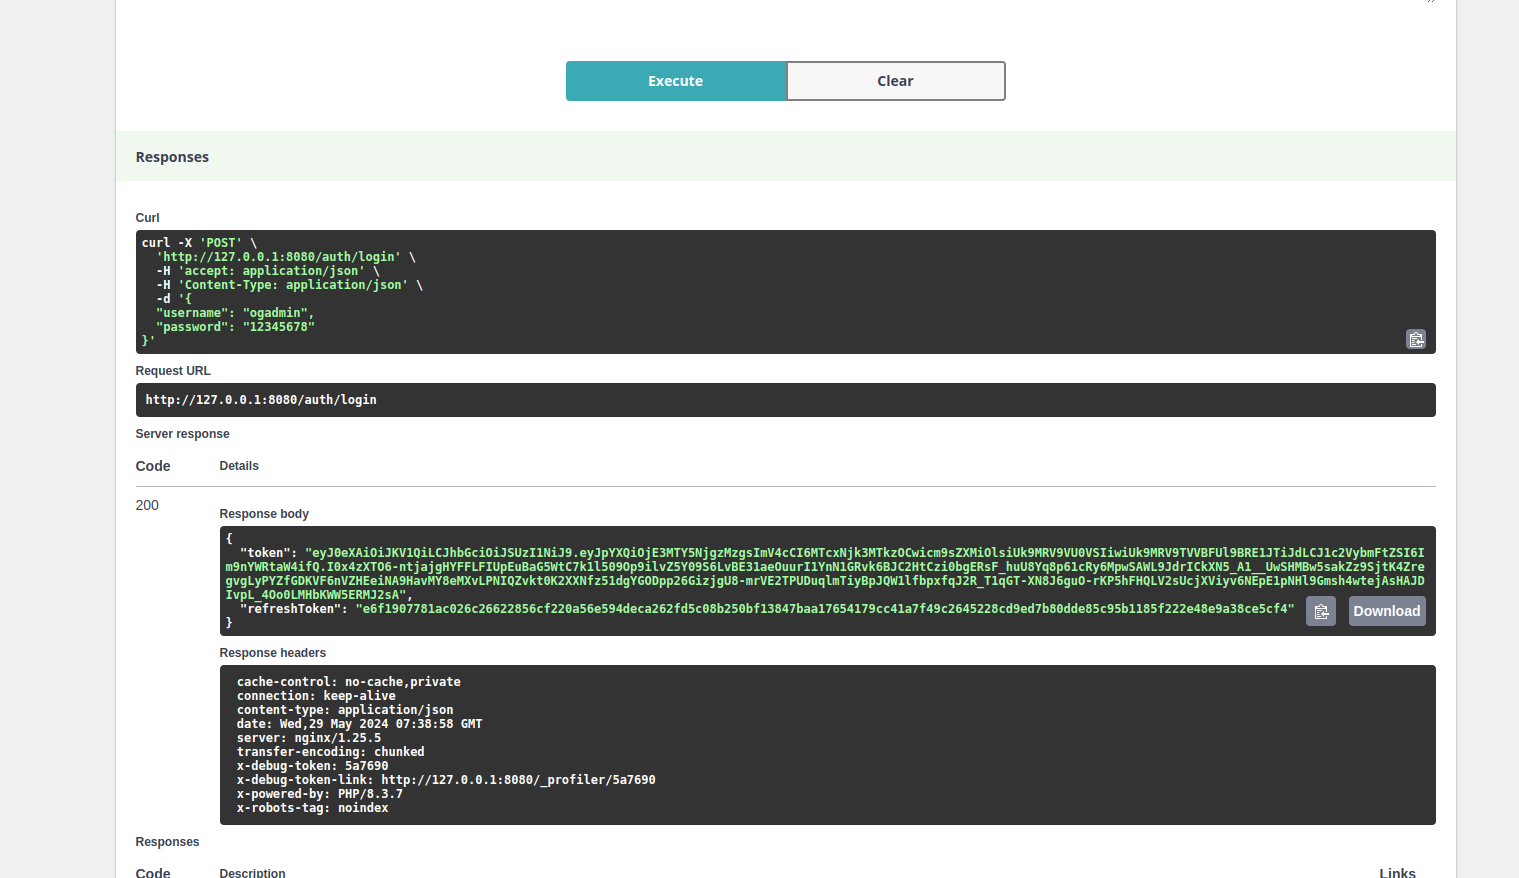 Obtain the token and enter it into the API Platform user interface as follows:
Now, we can interact with the ogCore API. To verify that everything is correct, we can check the headers of the Curl calls and see that the JWT token has been correctly included.
Test
To run the tests, execute the following command:
docker compose exec php bin/phpunit
Reset Database
It may be necessary during development to reload the database and update its schemas. To do so, run the following command:
docker exec ogcore-php php bin/console doctrine:database:drop --force
docker exec ogcore-php php bin/console doctrine:database:create
Data Migrations
To migrate data from the "old" database, we first need to have a database schema with a dump from OpenGnsys. That is:
- We create a temporary database simulating an OpenGnsys 1.1 instance. We will request it from the university development team.
- We will need a dump of the OpenGnsys 1.1 database.
Using Doctrine, we create the temporary database:
docker exec ogcore-php php bin/console doctrine:database:create --connection=og_1
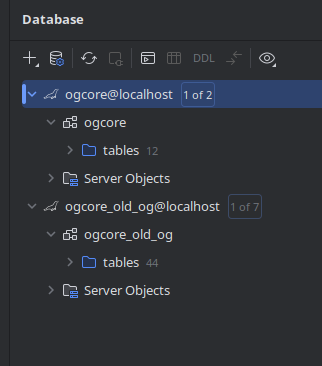
Here we can see that we have 2 databases. OgCore is the current one where we are developing, and ogcore_old_og is the temporary database we just created.
Here would come the step of loading the dump into that database, since it contains sensitive information, it is not hosted in the repository, so we will need to request it from the appropriate team. Once we have the database loaded, we can run the data migrations:
--- Migraciones de OpenGnsys.  ---
docker exec ogcore-php php bin/console opengnsys:migration:organizational-unit #cargamos las unidades organizativas
docker exec ogcore-php php bin/console opengnsys:migration:hardware-profile #cargamos los perfiles de hardware
docker exec ogcore-php php bin/console opengnsys:migration:clients #cargamos los clientes
docker exec ogcore-php php bin/console opengnsys:migration:os #cargamos los sistemas operativos
docker exec ogcore-php php bin/console opengnsys:migration:image #cargamos las imagenes
docker exec ogcore-php php bin/console opengnsys:migration:software-profile #cargamos los software profiles
Objects of Interest
A .zip has been included with the API collections of ogCore to work with, test, etc. in Postman. To import them, simply go to the import tab and select the .zip file.