5.7 KiB
Create Image
[TOC]
Scenario
There is a need to create an image from a computer which we will call model. For this, we need to have a computer created in our database to which we have a connection and with an operating system.
This is the scenario used for this demonstration:
-
Center:
- Name:
Centro Demo
- Name:
-
Classroom:
- Name:
Aula Demo - Router IP:
192.168.2.1 - Network mask:
255.255.255.0
- Name:
-
Computer:
- MAC Address:
08:00:27:4F:BE:38 - Name:
modelo - IP Address:
192.168.2.2
- MAC Address:
-
Subnet:
- Address:
192.168.2.0 - Network mask:
255.2555.255.0
- Address:
-
Image:
- Name:
image-test - Description:
imagen de referencia - Type:
Linux - Version:
Ubuntu 24.04 - Architecture:
x86_64
- Name:
-
Repository:
- Path:
/opt/opengnsys/ogrepository/images - IP:
192.168.68.55
- Path:
-
ogAgent:
- Version:
1.4.5~pre7-1 all
- Version:
The goal is to create an image from the computer modelo with the specified characteristics, in order to later replicate/clone it to the rest of the clients.
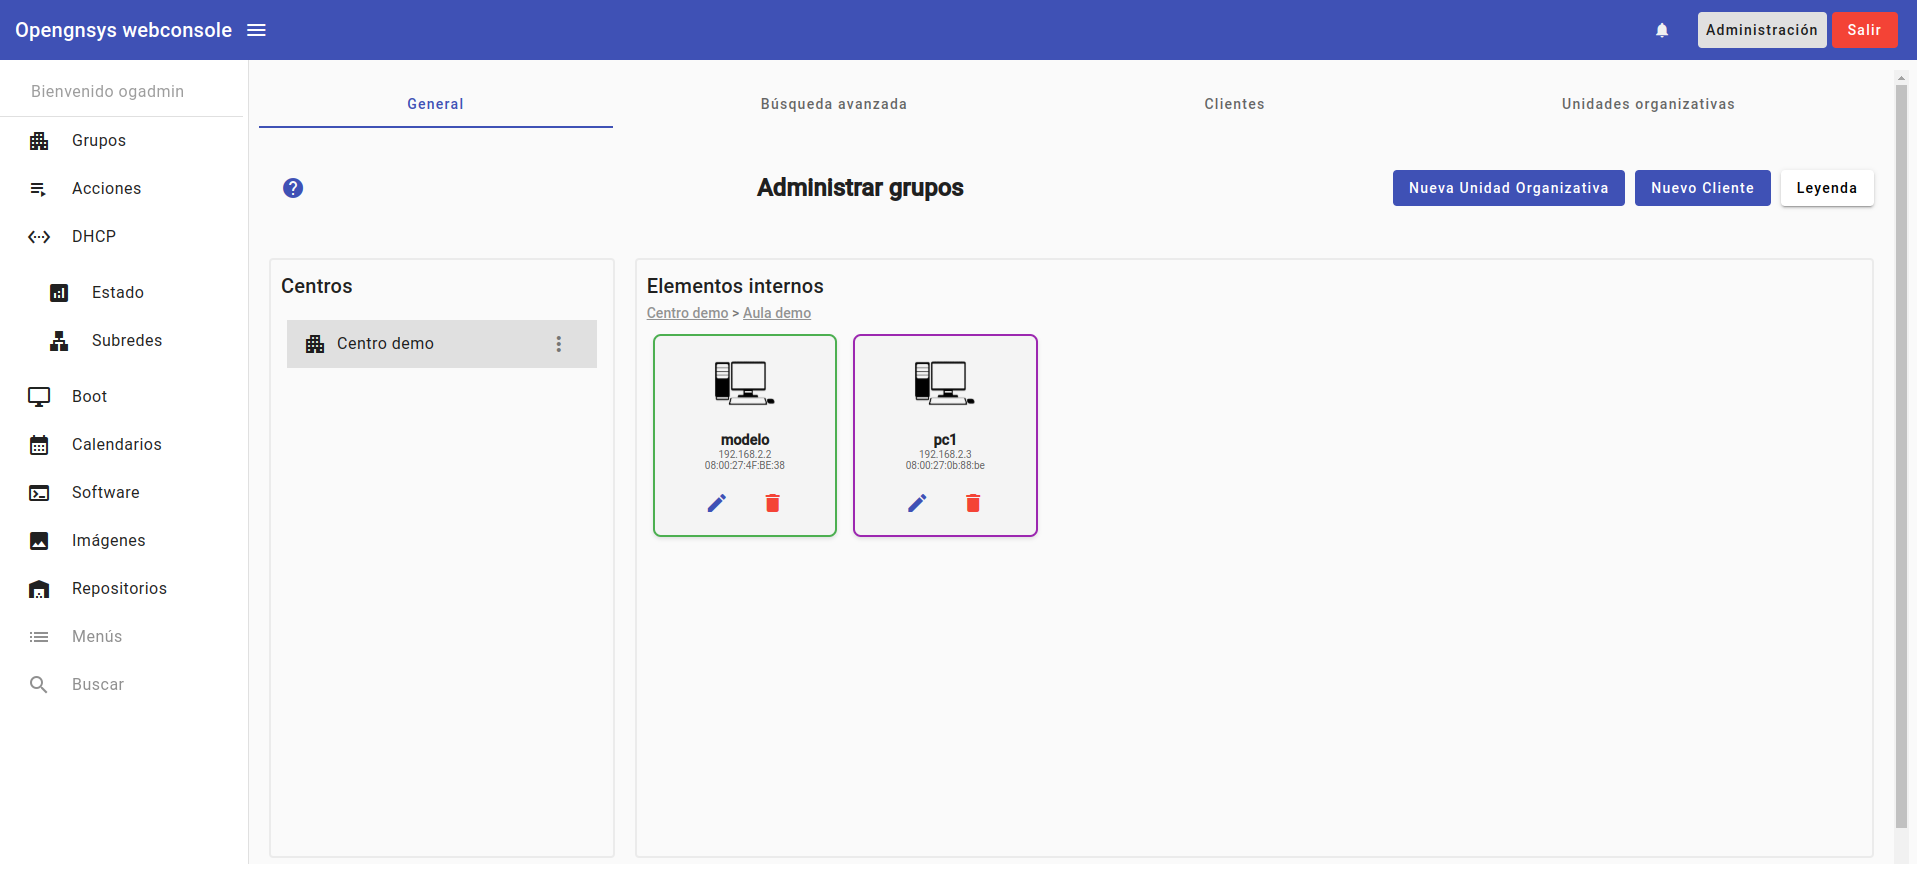
In the following screenshots, the layout of the groups and clients in the ogGui graphical interface is shown.
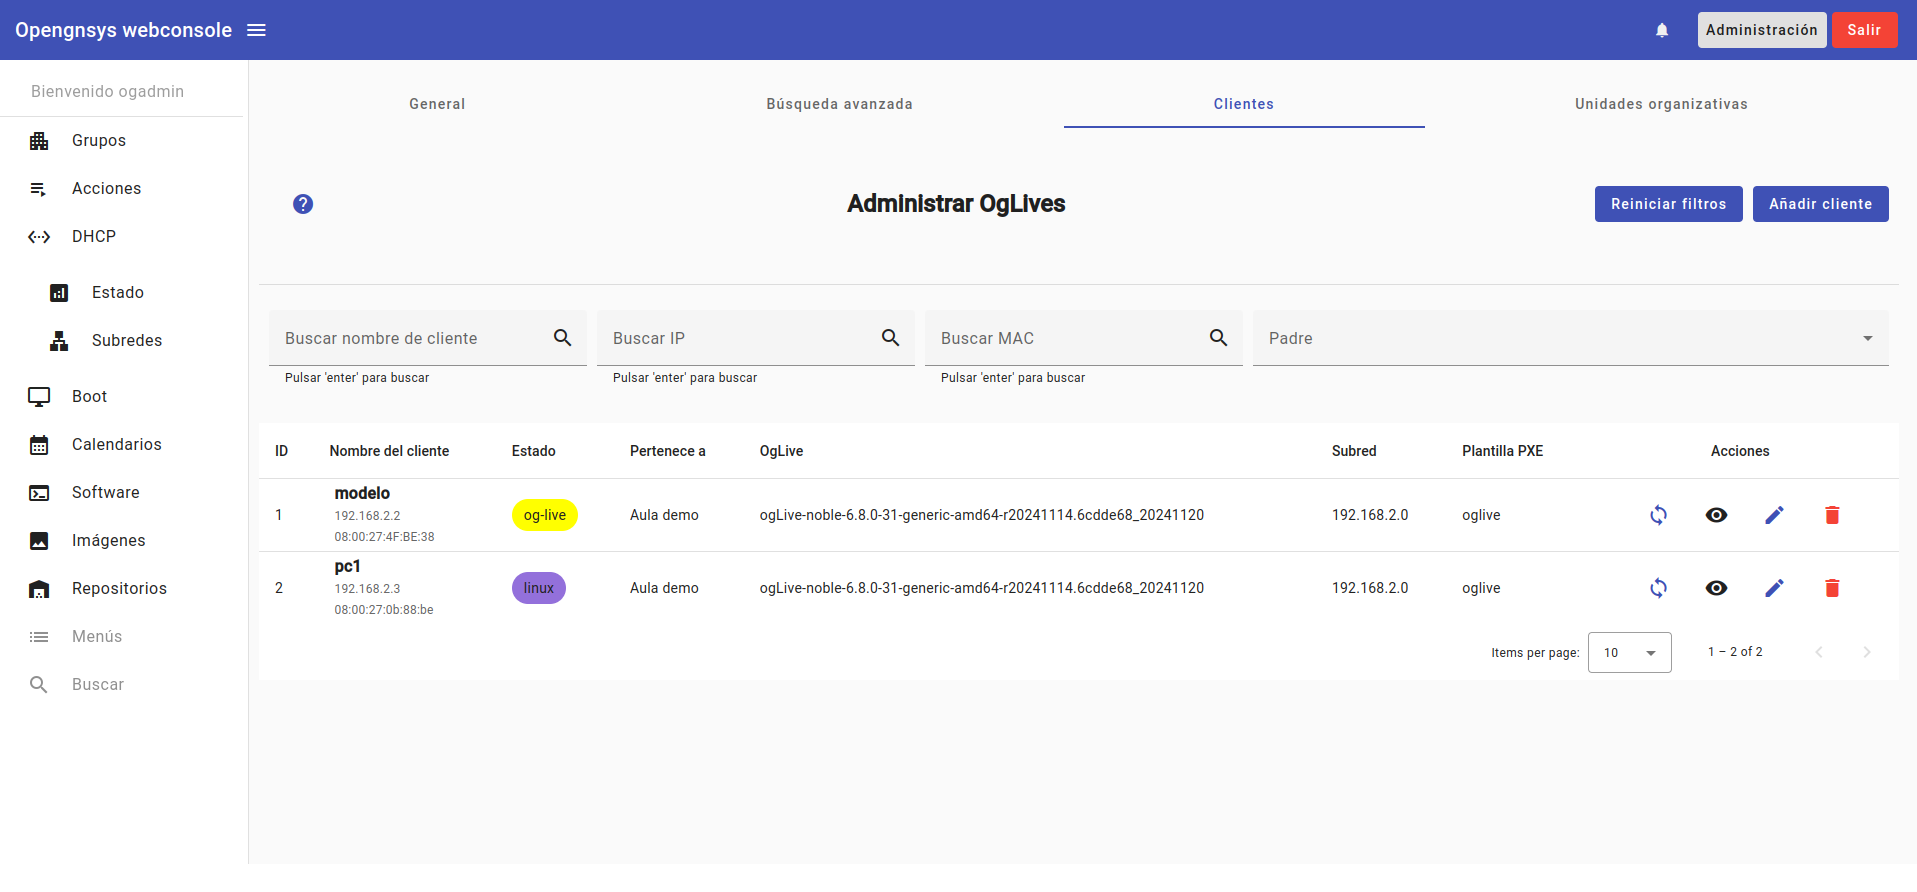
The ogGui/ogCore tool provides us with a graphical interface through which we can create an image. In the current version, we will do this via the "Clients" tab within the group administration panel.
Create an Image
- Select the model client. Using the Clients tab in the group administration panel, we access the client options by clicking the "View" button (the one with an eye icon).
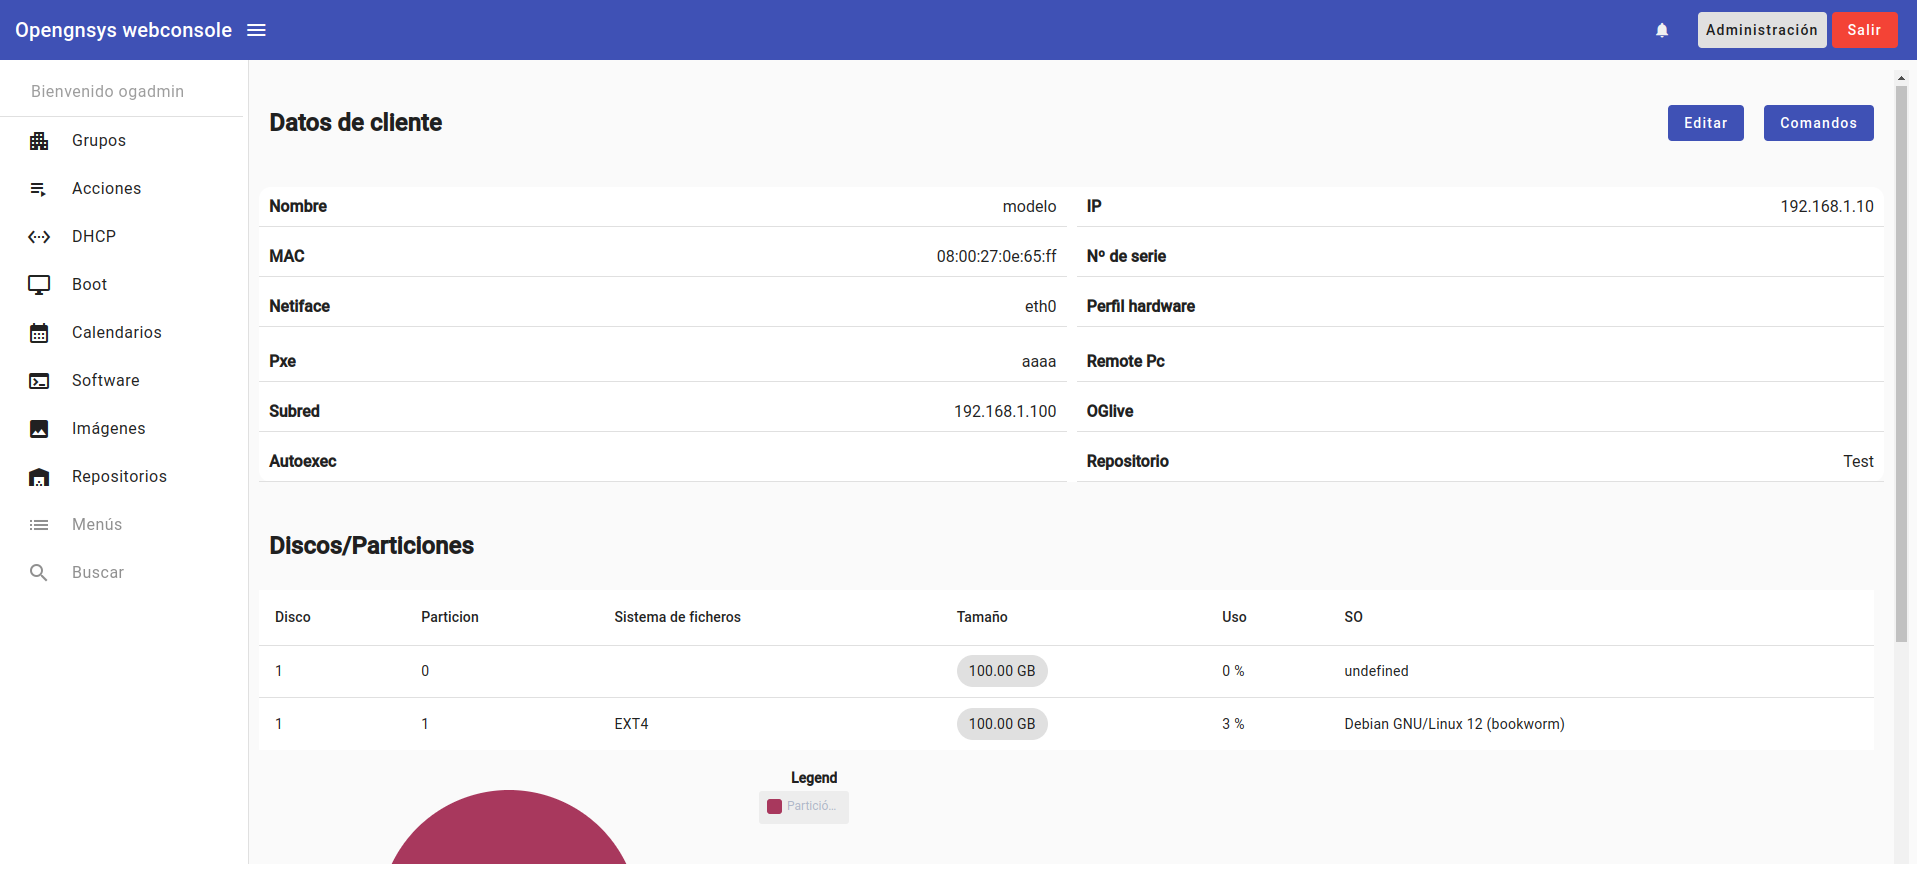
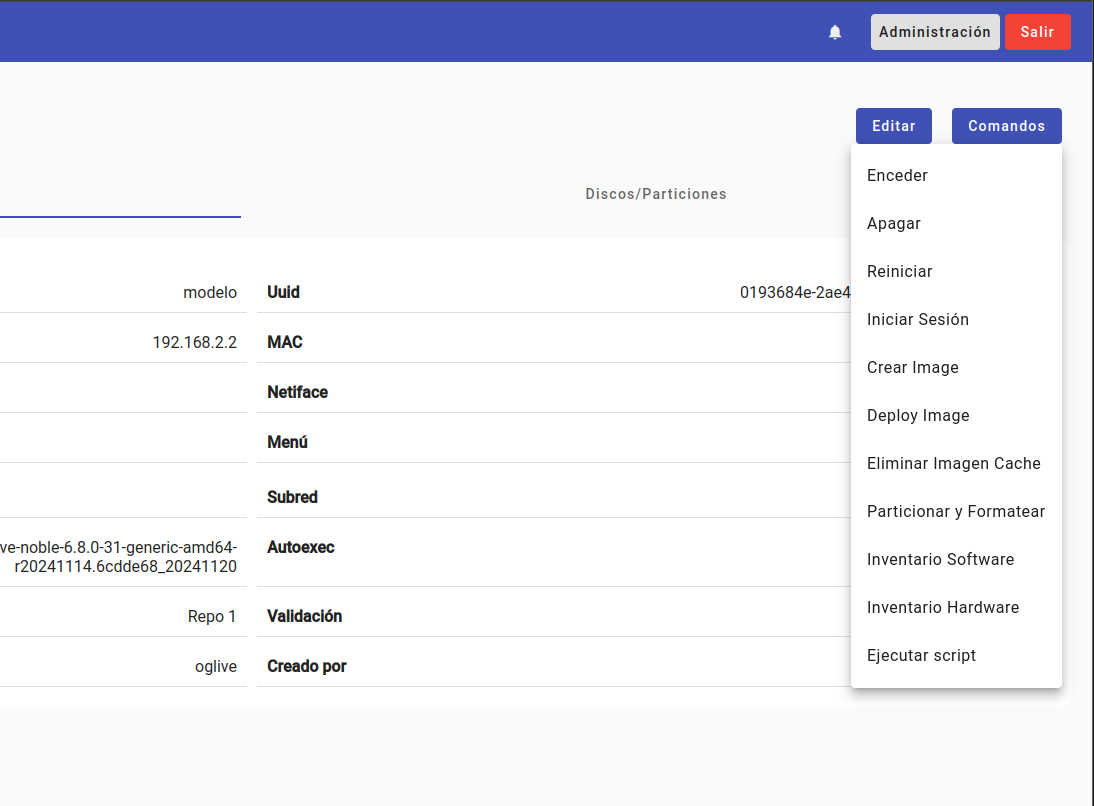
This gives us access to the client's panel where its general information and the status of the partitions are displayed. At the top right, there is a button with all the available actions.
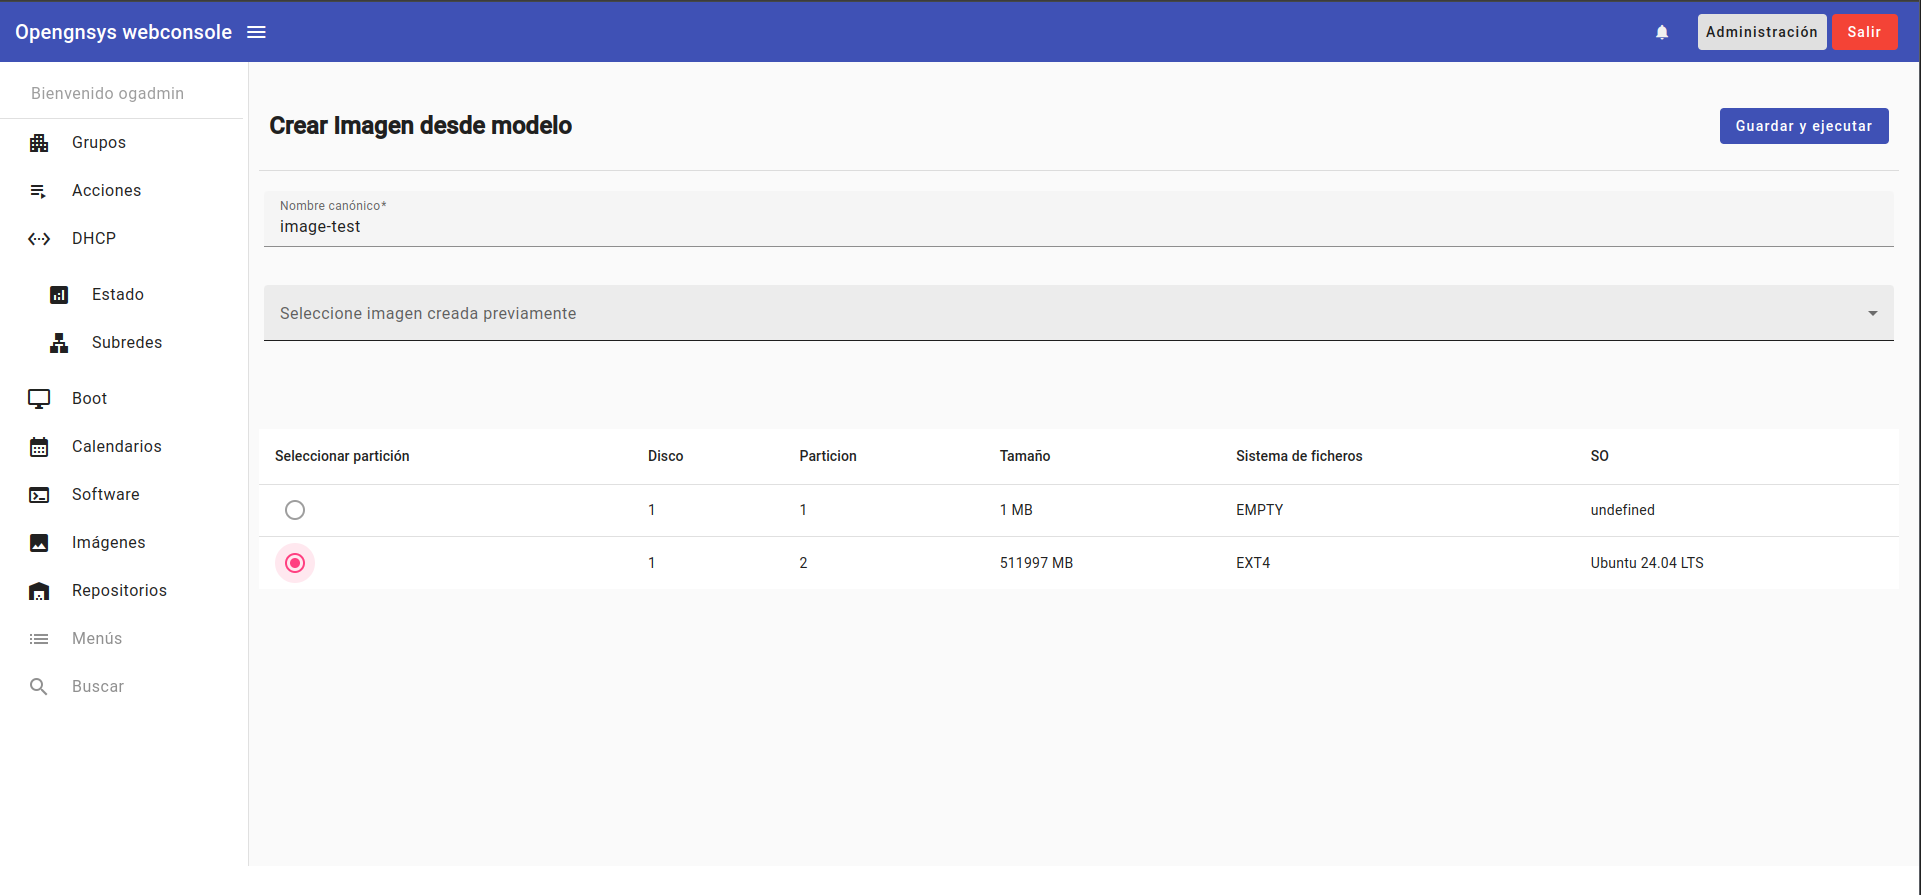
- Create image. We click the "Create Image" button and fill out the form with the data for the image we want to create. In this case, the data is as follows:
- Canonical Name:
image-test - Previously Created Image: in this case, we leave it blank.
- Select Partition: We select the partition which has Ubuntu 24.04 installed.
- Canonical Name:
If everything went well, the graphical interface returns a green confirmation message in the bottom right corner. This means that the ogAgent has correctly received the API call and is working on creating the image.
Verify Image Creation
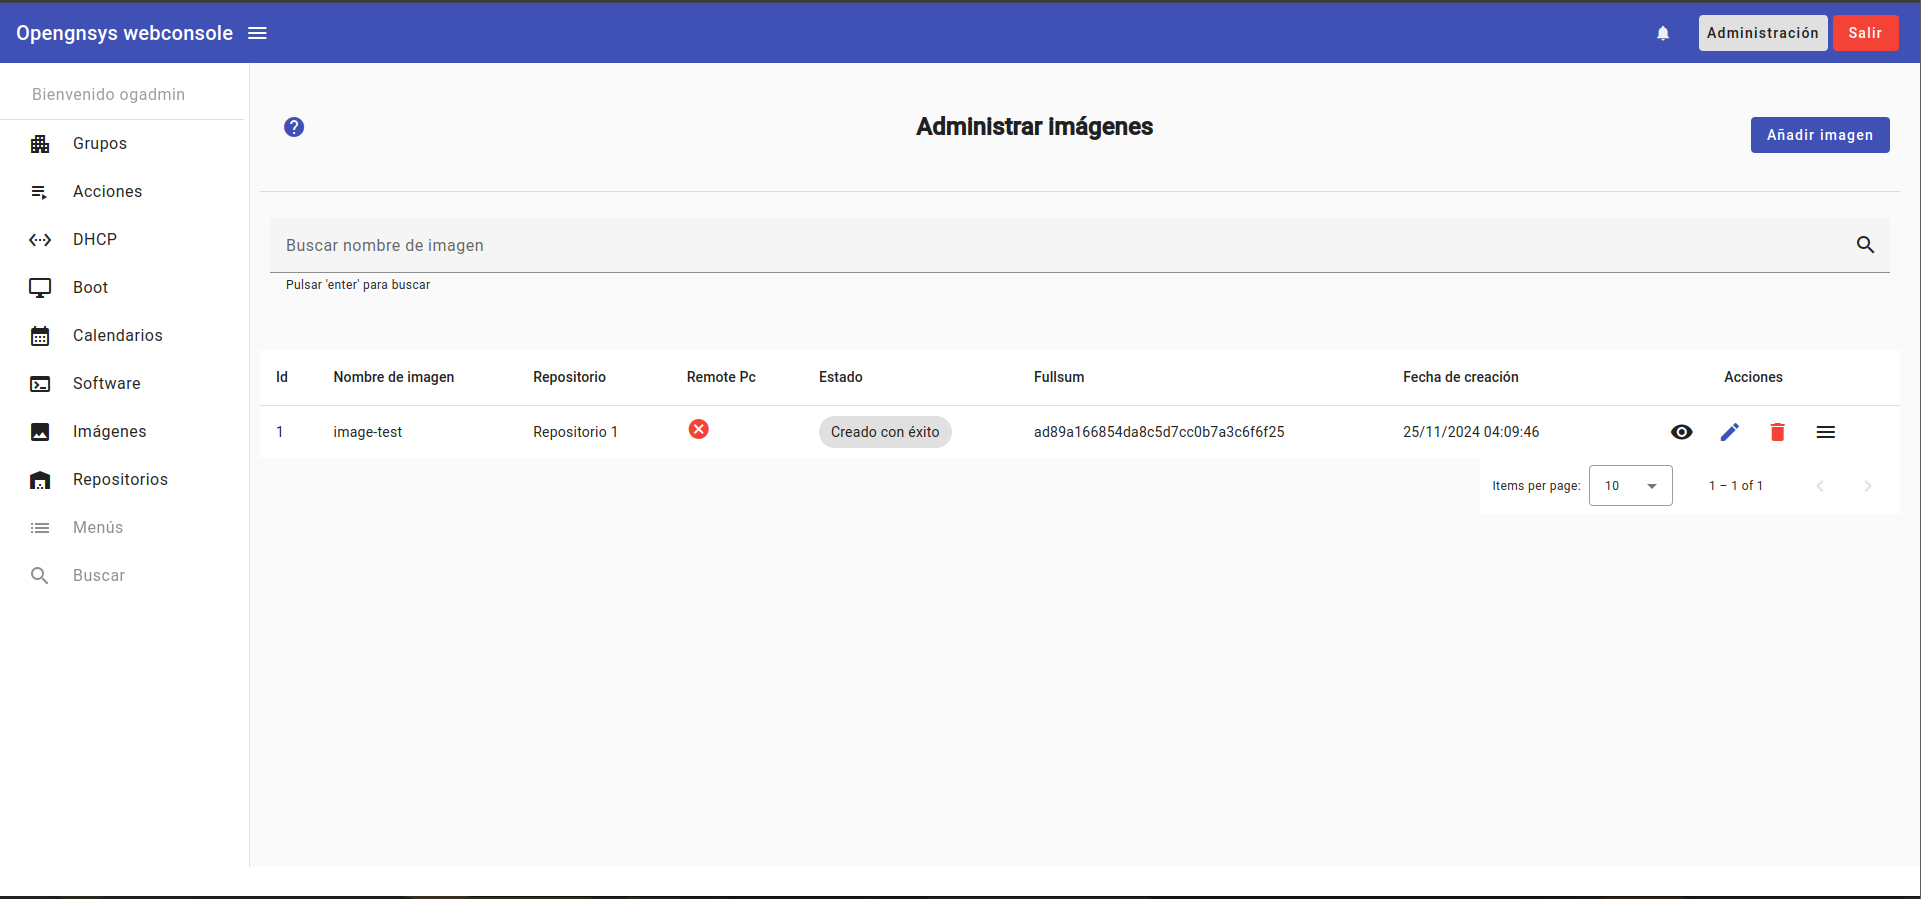
In the image administration panel, we can view the status of the image we have created.
The tool stores images in different states, which are:
- States:
- In Progress:
in-progress. The image is in the process of being created; the ogAgent is working on it. - Auxiliary Files Pending:
aux-files-pending. The image has been created in the repository, but the auxiliary files and the fullsum (from now on the unique associated identifier) have not yet been generated. - Completed:
success. The image has been created successfully. It is in the image repository with its associated files generated successfully. - Failed:
failed. The image could not be created due to an error in the process.
- In Progress:
Once the process has finished, we should be able to see something similar to the following image:
Traces
For the system to function correctly, communication between the ogCore, ogAgent, and ogRepository components must be asynchronous. To achieve this, traces are used to allow us to see the status of requests and responses.
We can access the system traces via the button with a bell icon in the top menu of the graphical interface.
A list of all the system traces is provided. We can use the provided filters if necessary.
For the demonstration example, we see 2 traces:
- Image Creation: the trace informs us of the agent's status regarding the creation of the image.
- Auxiliary Files Creation: the trace informs us of the creation of the auxiliary files associated with the image.
Repository
Inside the image repository, we can see the image we created in /opt/opengnsys/ogrepository/images
API Calls to the Different Components
- ogAgent: This is the call that ogCore makes to the ogAgent to have it create the image. It returns a job_id which will be shown in the interface trace related to the creation of this image.
curl -X POST --data '{"dsk":"1", "par":"2", "cpt":"83", "idi":"01936caf-facb-72ad-9446-97e7dbf2b96a", "nci":"image-test", "ipr":"192.168.68.55", "nfn":"CrearImagen", "ids":"0"}'
https://192.168.2.2:8000/CloningEngine/CrearImagen
{"job_id": "CrearImagen-93992a4b"}
- ogRepository: This is the call that ogCore makes to the ogRepository to have it create the auxiliary files associated with the image. It returns a job_id which will be shown in the interface trace related to them.
curl -X POST --data '{"image":"image-test.img"}'
https://192.168.68.55:8006/ogrepository/v1/images/torrentsum
{"job_id": "CreateAuxiliarFiles_eba647d4"}
These calls communicate their statuses to ogCore via webhooks, and ogCore takes care of processing the response and changing the status when necessary.
